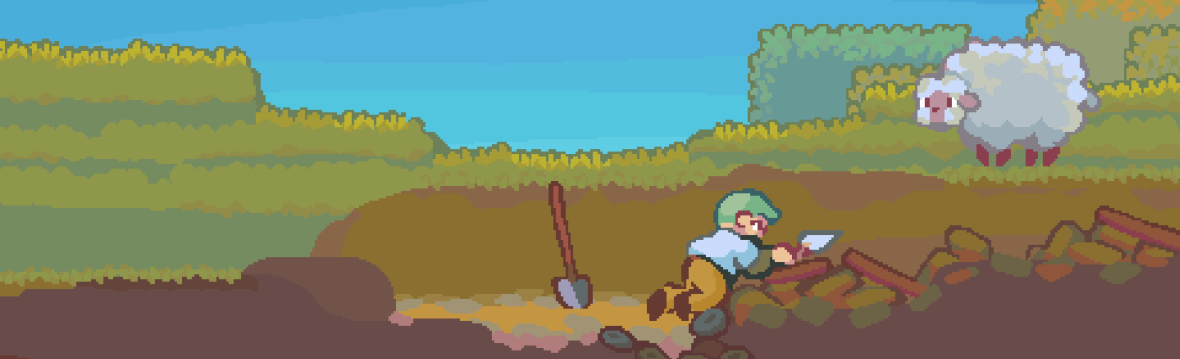

I’ve now built a few sites in Minecraft, and one thing I’ve learned is that each site is different – they all present their own challenges. Often the things you think will be difficult are actually much easier than you thought, and things that you think will be simple… aren’t so much!
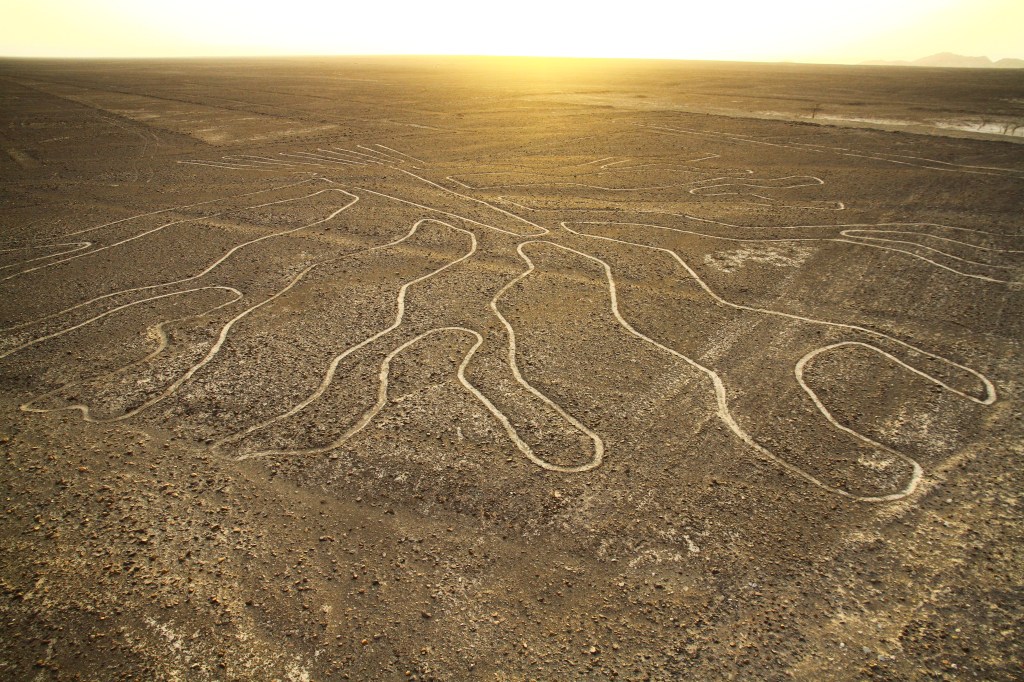
The Nazca Lines aren’t your typical archaeological site. They’re enormous geoglyphs in the Sechura Desert of southern Peru that cover a total area of 450km2 (170mi2). There are over 800 lines and over 70 plant and animal motifs, with still more being discovered through the use of drones and even some machine learning.
Materials
Minecraft can do a lot, but it can’t do everything. When I first thought to make the Nazca Lines, I thought I might use gravel and path blocks. Path blocks are a few pixels shorter than full blocks like gravel, so it would be a way to simulate the scraping the Nazca did without going too deep. Slabs would show that sort of depression, too, but if we think of minecraft blocks as a meter deep, slabs would be 50cm thick. The depression would be 50cm rather than 10-30cm, which is a bit too deep for what I was trying to do.

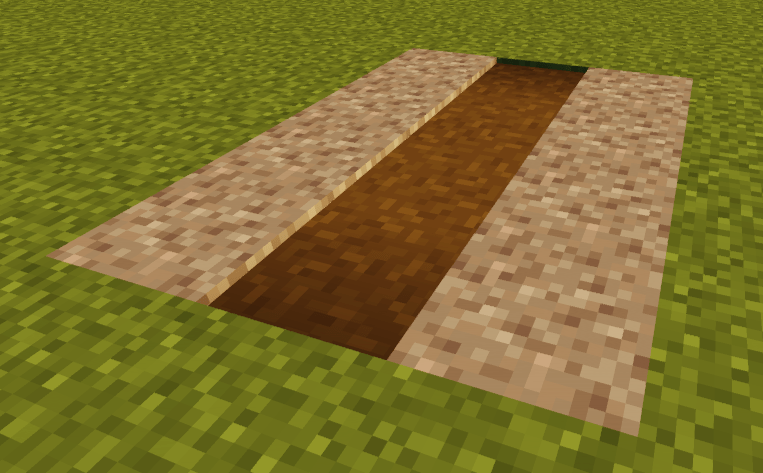
But there are three big problems with path blocks. First, they are a full block wide, so even though they would capture the depth of the Nazca Lines really well, they would all be a full metre wide. While some lines are up to 1.8m wide, most of the Nazca Lines are closer to 30-50cm.
Second, I would also need to put a full block between any path blocks that made up the lines in order to separate them. But the separation between most of these lines is less than a metre, or at the very least, the space taken up by two lines plus the space in between is usually far less than three metres.
And finally, the colour of the path blocks isn’t quite right for the clay and gravel found in this part of the Sechura Desert. I could have used clay and given up on the depth between blocks in favour of colour, but the same issue of the width of the line sand the spacing between them would still stand.

So I had two options, really – increase the scale of the designs in favour of preserving colour and material, or fudge the colour, materials and depth a bit in favour of scale.
Part of the impressiveness of the Nazca Lines is their scale. It’s a defining feature. Increasing the scale would only make them more impressive, but I didn’t want anyone thinking the real Nazca Lines were somehow less impressive simply because they are technically smaller scale than what I ended up building in Minecraft. So that’s when I had the idea to use stairs.
Stairs in Minecraft are… well, they don’t always like to behave! They join together in nice ways depending on how you orient them, but if you do that too close to another orientation of stairs, it might change everything in a way you don’t want. You can see a few times in the video where I have to play around a bit with the stairs to get them to the orientation I wanted!

We also don’t have that many options for stairs in Minecraft. For ones that will match the colours of a Minecraft gravel block, but don’t look like they’re individual stones lined up nicely, our options are basically andesite or stone stairs. Andesite blended in better with the gravel, so I opted for those.
Which Lines?
So I had the materials, but that’s a relatively small part of building! The next question was which of the lines to build. I thought I might do one of the straight lines, but I really wanted to get a couple of the animal forms built, since those are often the most eye-catching.
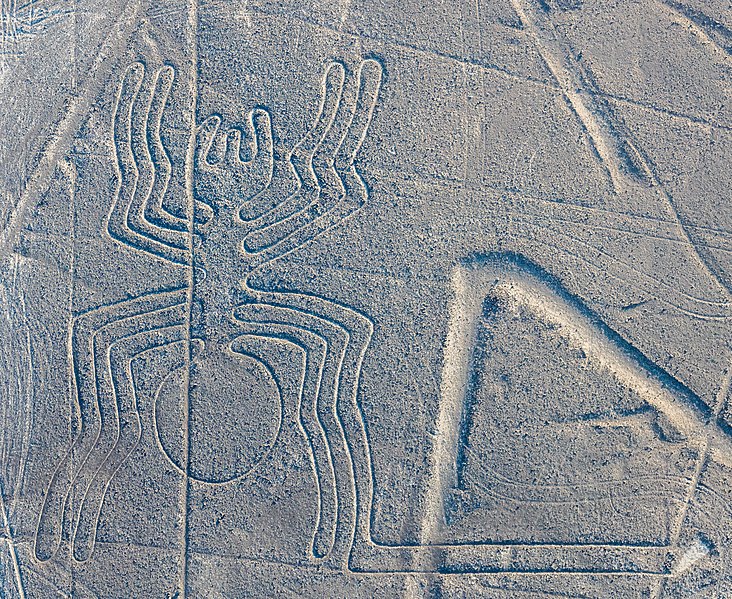
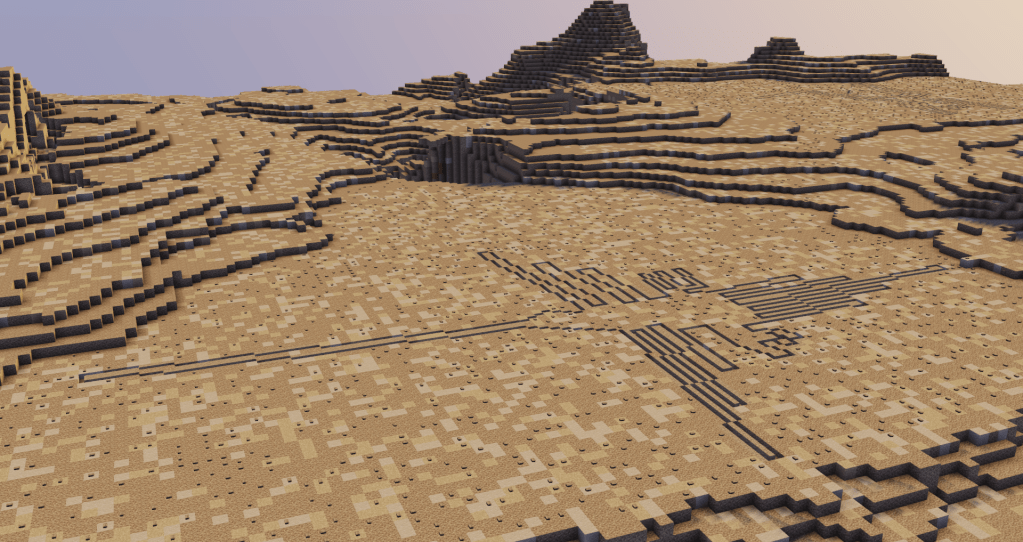
I like the Nazca spider. Honestly, that was my main reason for choosing it – it looks cool, it’s well-known, there are some really nice images of it and I thought other people would like it, too! I also thought it had a relatively simple (ish) shape that I could probably replicate in Minecraft.
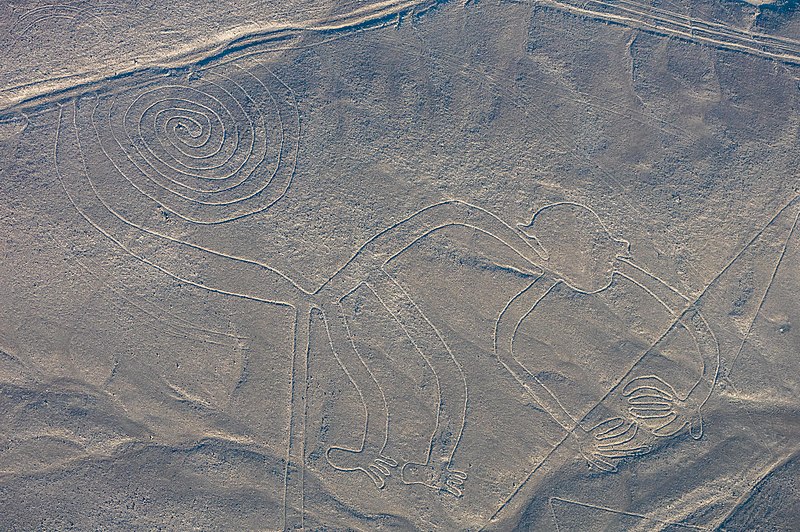
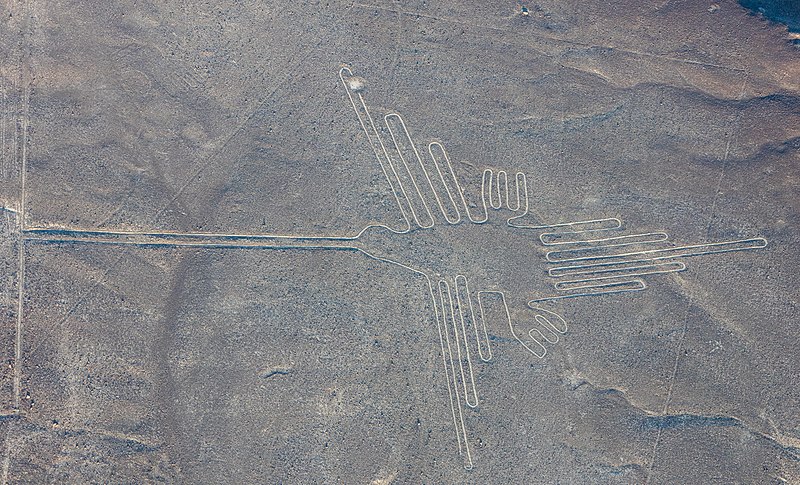
For the second, I debated doing the monkey, which is also a very well-known glyph. The difficulty with the monkey is the spiral in the tail. I didn’t think I would be able to replicate that with stair blocks very well, at least not without the stairs misbehaving at every turn! So I instead opted for the hummingbird. The hummingbird is also a well-known glyph and is twice as long as the spider. It has more straight lines, but the feathers on the wings and the tail are also closer together. I thought it would be an interesting set of challenges that differed from the spider, but would still work in Minecraft.
How I Built the Nazca Lines in Minecraft
We know that the Nazca created their glyphs using string, sticks and basic landscaping techniques. That’s somewhat possible in Minecraft, at least if you’re working on a bigger scale. But since stairs cover half-blocks and there’s no real way to connect string between two points in the game (at least not without mods), I opted for the grid method instead.
I first went to Google Maps and looked for the Lines. Google has a scale at the bottom of every map, which you can use to measure buildings or, in this case, geoglyphs. I use Google Maps a lot in my builds, especially when trying to figure out scale!
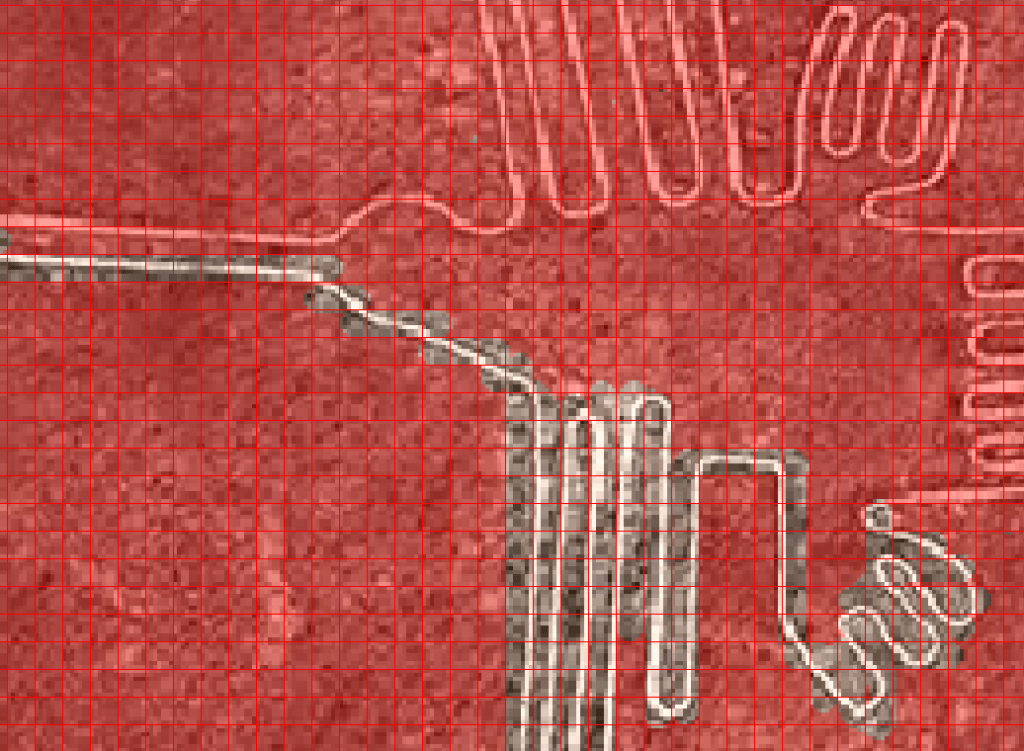
Once I knew how large the hummingbird was supposed to be, for example, I tried to find the best orthographic or top-down photograph of the hummingbird I could so that scale was relatively consistent. I then messed around in Photoshop with the grid settings until I had created a grid that was more or less what the scale of the glyph should be, assuming each square in the grid = one block in Minecraft = one metre.
Once I had that, I plotted out the area in a superflat Minecraft world and filled in every square in the grid that was just solid gravel. Once that was done, I went through and filled in the stairs, making sure to put the indent of the stairs on the half (top, bottom, left or right) of the grid taken up by the line.
Surprisingly, the only three places I really struggled with were the part of the pider’s left side legs that join with the body and the feet and tailfeathers of the hummingbird. The feet were difficult because the stairs just did not want to orient themselves in the way the lines should be oriented, and I couldn’t really separate them out further. The result in the video is the best I could manage, which I honestly think is pretty good. As for the tailfeathers on the hummingbird and the spider’s legs connecting on the left side, there’s nothing inherently difficulty about them – it was more the fact that in both cases I had been staring at lines and grids and stairs for several hours in each case, and I was having trouble following them all!
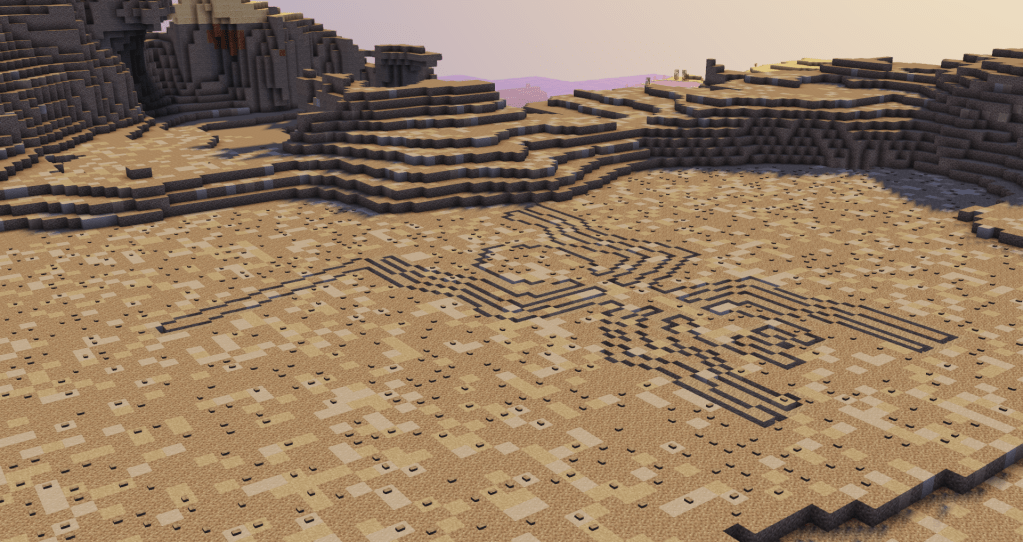
So that’s how I did it! Part of me feels like I should have included one of the straight lines afterall, but the biomes in Minecraft aren’t that large and the ones that appear near either the hummingbird or the spider tend to actually pass through them, and I didn’t have away of representing that well. But all in all, I’m quite please with both my spider and my hummingbird – and I’ve absolutely learned a lot about working with Minecraft stairs!
If you want to learn a bit more about the history of the Nazca Lines and see what it’s like to walk around the finished product in Minecraft, have a look at my video:
